
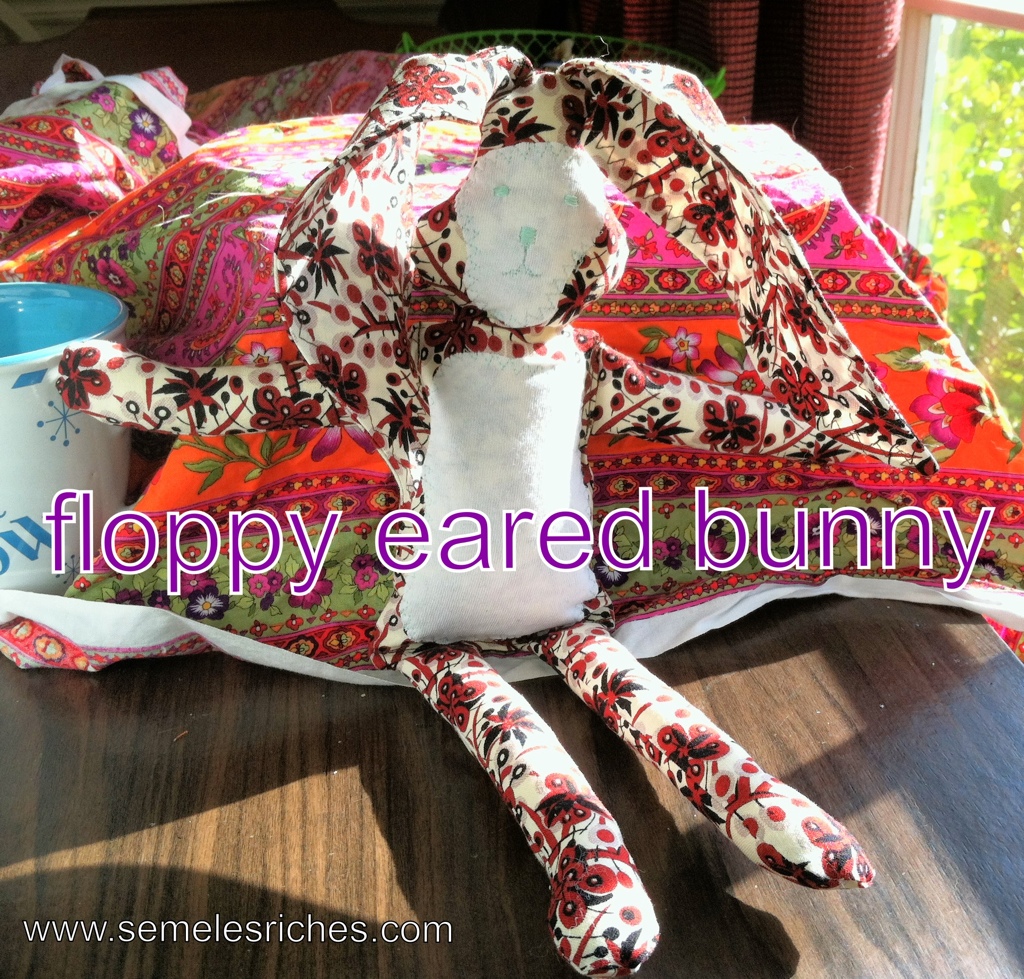
 This floppy eared stuffed bunny has articulated joints, requires no hand sewing, and takes just 1/4 yard of fabric, so he is also perfect for using up scraps from your stash. Download here: FloppyEarBunnyPattern12-2012semelesriches
The pattern does NOT include seam allowances. I recommend that you use this pattern by printing it onto cardstock, cut out your pattern pieces, and then then trace them onto your material on the wrong side. Sew along the line and THEN cut your pieces out. This allows you to work more precisely and without worrying that tiny pieces will be destroyed by bobbin snatch. Use a short stitch length (I like 1.5 on my machine) and GO SLOWLY.
Apply the appliques to the rabbit front first. I prefer to freehand my appliques and the face, but if you prefer, I have included some applique pieces in the pattern. Just use a tracing wheel and pattern transfer paper to mark where the applique pieces should go, sew them in place, and then flip the material over and trace the body piece onto your fabric. You can embroider or draw/paint a face. I like the bar stitch on the widest setting for eyes and nose.
Sew around the body, leaving open where indicated. Sew around each limb and ear. Cut out the ear and limbs and turn them inside out. Press and topstitch your ears- I like to use a decorative stitch- and create the dart that shapes the ears. Then, poke the bottom end of the ears out through the opening in the top of the head and sew the rest of the head closed. turn the body and head right side out. (You should start to see your rabbit’s personality now!)
Stuff the limbs. Place the arms in the openings on each side of the body and sew in place. Stuff the body, turn up the bottom of the body opening, and sew closed with the legs in place. Now you’re finished except for showering the bunny with love!
Pingback: Sock Monkey and beyond: Stuffed toys to make